Step 1: Become a Marketplace Seller #
1) Login to the CAC user portal from the CAC website: https://login.cacgrading.com/
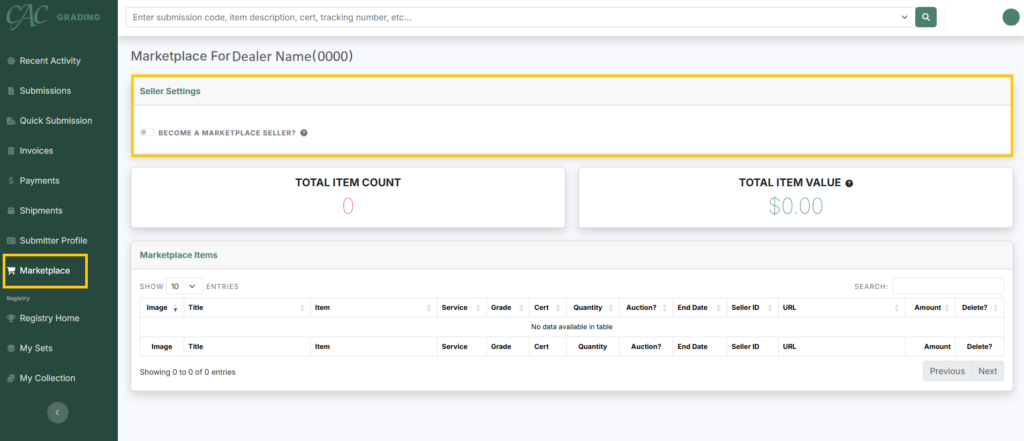
2) Select Marketplace from the navigation menu.
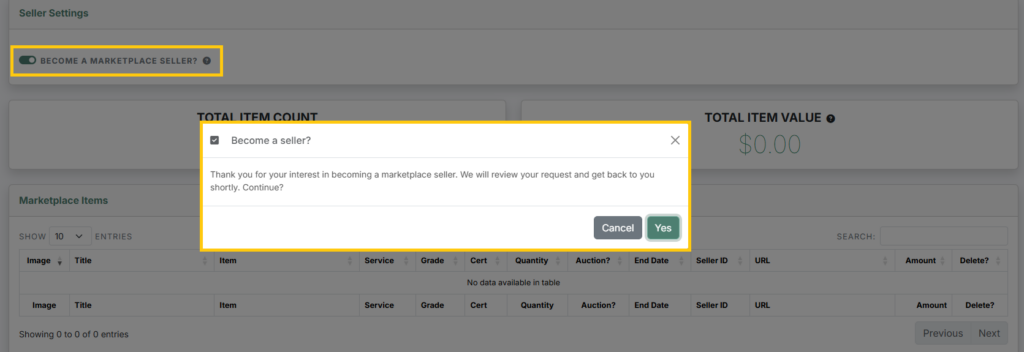
3) In the “Seller Settings” box, toggle “Become a Marketplace Seller?” on.
4) Once toggled, you will receive the below message noting that our Customer Care team has been notified of your request to participate in the Marketplace.
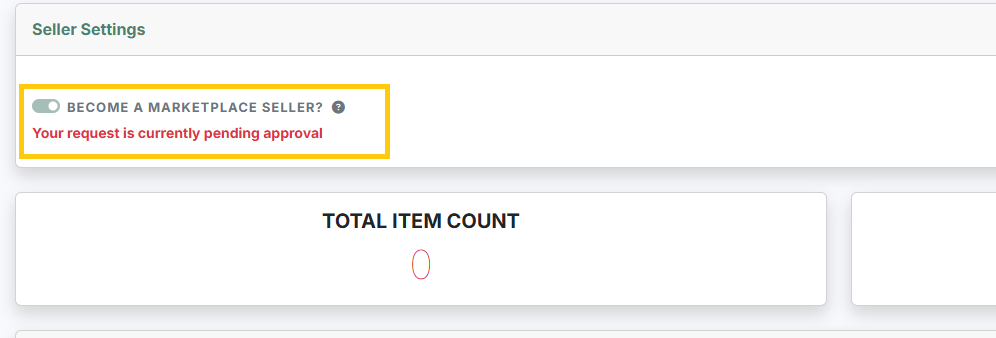
5) The message “Your request is currently pending approval” will display in the Seller Settings box until CAC has approved your request. CAC will be notified right away of your request to become a seller, but please allow 2 to 3 business days for approval. Each dealer is screened by the membership team for selling approval, and CAC has the right to approve or reject any seller for any reason.
6) Once your request has been approved, you will receive an email letting you know. A message will also appear on the Marketplace tab of the portal giving you the greenlight to become a Marketplace seller. You must toggle the setting back on to then select your desired participation tier.
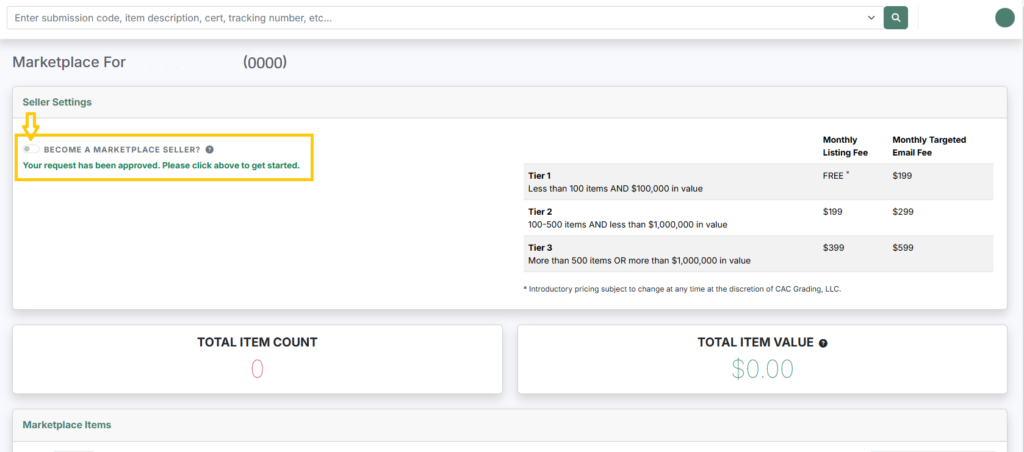
7) Tier selection is available immediately, and the billing day will fall on the day you enable participation. Select 1 of the 3 tiers based on your inventory size and value; we allow CAC (graded and stickered), PCGS, and NGC coins to be listed in the Marketplace. Targeted emails are optional for an additional monthly fee.
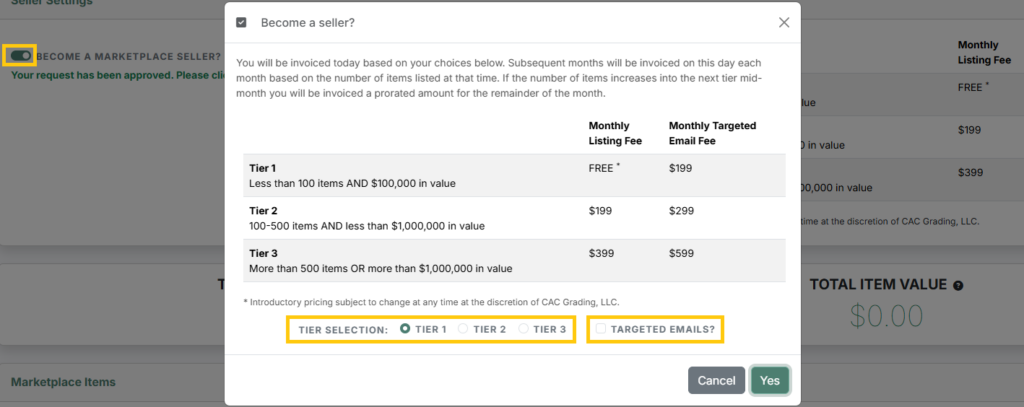
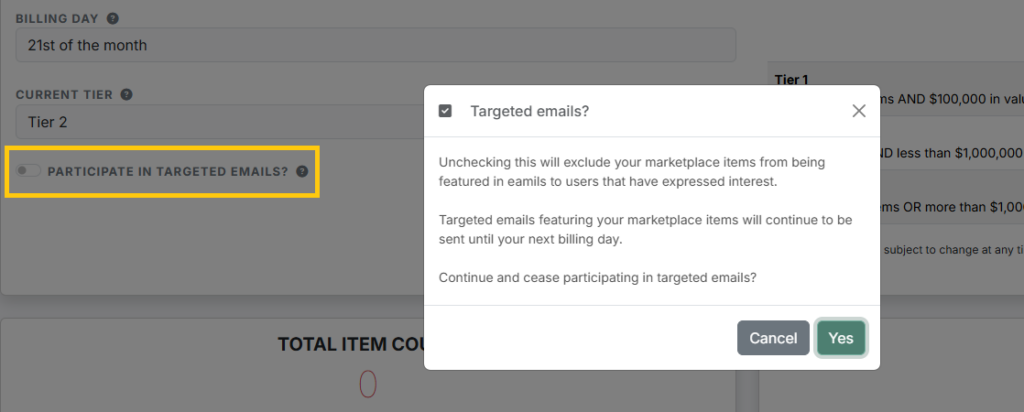
8) Targeted emails are marketing emails sent to users that have an interest in your marketplace items. For Registry users and CAC submitters who utilize the Want List feature, items in your inventory that are present on their Want List will be sent to them via email notification.
9) The text entered in the “Name” box is the name that will appear under your marketplace items. The default name will be the name on your dealer account, but it can be changed at any point from the Marketplace dashboard. Select “Yes” after updating your name to save the changes.
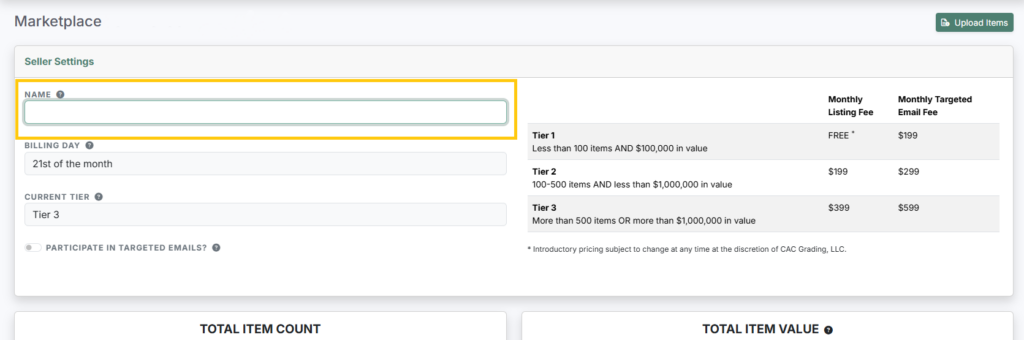

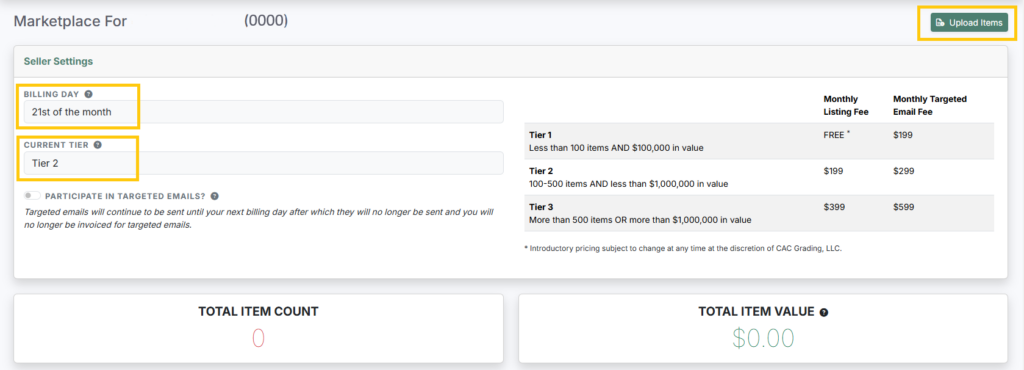
10) From the Marketplace dashboard on the User Portal, you will always be able to view your billing day, current tier, and participation in targeted emails (which you can add at any time). Please reach out to our Customer Care Team if you have any questions about these selections.
The next step is to learn more about uploading your items in “Manage Your Inventory.”
Step 2: Manage Your Inventory #
You have two options in maintaining your inventory in the CAC Marketplace: 1) via spreadsheet uploads, or 2) via API. In either case, our goal is to keep your inventory as accurate as possible, so please keep it updated regularly.
Option 1: Spreadsheet (CSV) Uploads #
1) Create a Spreadsheet (CSV) File to Upload #
- The spreadsheet column headers are to be listed as Inventory ID, Cert, GSID, PCGSID, Title, Grading Service, Grade, Quantity, Retail Price, Auction Date, Image URLs, and product URL. For a template import file or list of all working column headings or aliases, please contact help@cacgrading.com.

- Please note that only a column for a PCGSID or a GSID is required, not both.
- The Excel or CSV file must contain at least a coin number (GSID or PCGSID) for each item, but graded coins also require Grading Service, Cert Number, and Grade.
- For auctions items, an auction ending date is required. No date or information is required in the “Auction Date” column for non-auction items. This allows both auction items and non-auction items to be present on the same file for uploading.
- If the quantity of an item in the Marketplace is greater than one (1), there should not be a certification number entered. This will cause an upload error as each item has a unique certification number regardless of the coin number, grade, etc. being the same.
- Save the spreadsheet as an Excel or CSV file.
2) Upload the File to the Marketplace #
- Login to the CAC Portal from your Dealer account and select “Marketplace” from the navigation menu.
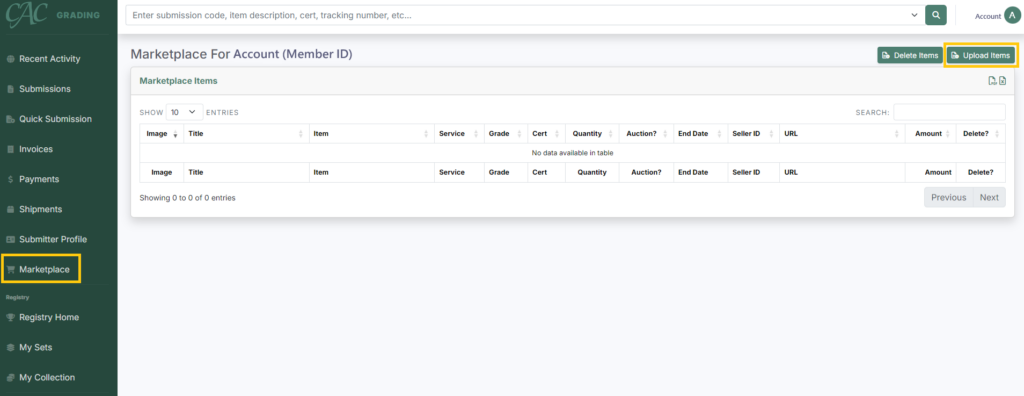
- Select “Upload Items” on the Marketplace to import the spreadsheet. A window will pop up with the instructions to import marketplace items file. Select “Choose File” to upload the created Excel or CSV sheet.
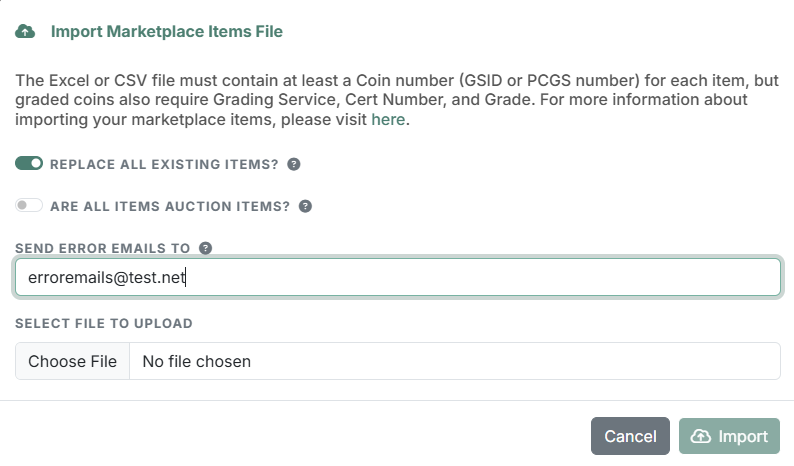
- Note that the default settings for upload are to “replace all existing items” and that all items are not auction items. Unless you have a specific reason to alter these selections, we recommend leaving these as the defaults. The importer will 1) add all new items on subsequent uploads, 2) update any items currently listed that are in the new file, and 3) remove any items not on the new file. An email will be sent to the address provided in “Send Error Emails To” containing a spreadsheet of any item(s) that fail to upload along with the reason. It may take a moment for all image URLS to load and display on the marketplace.
- Please note that all CAC Marketplace items expire after 14 days of the upload date. You must upload a new spreadsheet at least every two weeks, though we recommend weekly or more.
3) Updating your Listings with Subsequent File Uploads #
- To update your listings, simply upload a new file (with the requisite information) using the same upload steps as previously described. Also note, as mentioned earlier in this document, that the default options (Replace all existing Items – ON and Are all items auction items – OFF) should be left as is unless there is a good reason to change them. But to reiterate the reasons, by “replacing all existing items”, the importer will 1) add all new items on subsequent uploads, 2) update any items currently listed that are in the new file, and 3) remove any items not on the new file.
4) Verifying your Listings #
- Pay close attention to the total item count and total item value displayed above the Marketplace Items. The submitter will be billed according to Total Item Count and Total Item Value even if it overrides the tier selected.

Option 2: API #
For users with significant IT resources, you may be better served by using our Application Programming Interface (API). Doing so will mean your inventory will automatically be updated in real time without human intervention. All necessary documentation is included in this link.
If you do not have access to our private API, please contact Customer Care at help@cacgrading.com to request your unique credentials.